


This may be the only bread recipe you’ll ever need. Bold statement, I realize. This Nourishing Nut & Seed Bread loaf is my favorite out of all the gluten free and vegan bread recipes I’ve tried and experimented with. This nourishing bread is more than just another bread recipe to me, it represents what Nutrition Stripped is all about. Getting back to basics of living, savoring, and enjoying a lifestyle rooted in whole, real, fresh, high raw foods with minimal processing. These foods not only taste delicious, but also give our bodies the chance to do what they were born and designed to do – regenerate, heal, and provide us with the physical ability to carry out our good work.
breaking gluten free bread.
Let’s just take a minute here and talk about bread. It’s a staple in households all over the world in some form or another. Maybe it’s pita for your family, or french baguette, or naan, rye, flour tortillas, dosa, lavash, sweet bread, flatbread, bing, biscuit, challah, ciabatta, and of course familiar to the states, white bread. Each and every one of us has some relation to bread or “breaking bread” which is a universal and communal part of our cultures during meal times. I embrace this aspect whole heartedly, and today I’m inviting you into my kitchen to break bread in a new way. I want to take this classic staple food that we all can relate to and share a recipe that’s not only embracing this cultural aspect but also nourishing our bodies 100%.
When I first went gluten free about 5 years ago, the move wasn’t just one of the best changes to my diet I’ve made, but it also opened my eyes into a whole new world of fun creations in the kitchen and recipe development. I noticed the one food item that I was constantly missing was bread. During family gatherings, holidays, parties, and social events, gluten containing fluffy bread was always present (and still is), and it used to be very difficult to pass up. Nonetheless, I do manage to avoid it (and the ensuing tummy troubles), and I’ve successfully and happily managed a life without consuming gluten in these situations. BUT this bread recipe is sure to make things a lot easier.
You may be thinking making bread is a daunting task, and I would agree! Mixing, kneading, allowing the yeast to rise, chilling, scoring, rolling, and then baking. Let’s remember, I like simple. I like simple foods, I like simple tasks, and simple recipes that are easy to make but of course enjoyable. This also makes for THE perfect recipe to make on your Batch Cooking day for meal planning for a busy week ahead, so be sure to download my meal planning guide to help!
Understandably, gluten free foods have come a very long way since being first introduced into the mainstream market, but let’s be real, gluten-free bread still has tremendous room for improvement. Also to note, the ingredients that are typically made to produce a palatable flavor and texture in these gluten free breads aren’t much healthier than their whole wheat containing counterparts.
Herein lies, the official bread loaf of Nutrition Stripped, the Nourishing Nut & Seed Bread. I’ve been experimenting over the years trying to find a classic bread recipe that I could use with everything and it’s been a fun adventure full of crumbly bread “failures” and very successful results (hence the Grain-free Banana Bread and GF Zucchini Bread). I wanted to narrow my focus on achieving a nut & seed bread recipe that could be used with everything my heart desires, that would also cultivate the satisfaction of warm bread as I used to enjoy in my pre-gluten free living days. This bread isn’t like traditional bread. It’s not quick cooking, it doesn’t rise, and it’s not light and fluffy. It takes some patience allowing it to sit, cook twice, and rest… but it’s completely worth the wait! It’s nutty, dense, chewy, and filling like no other bread you’ll try.
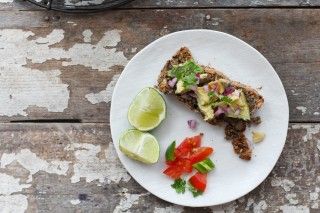
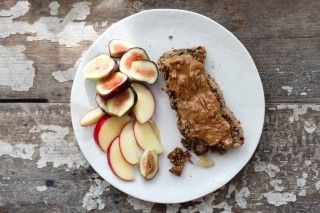
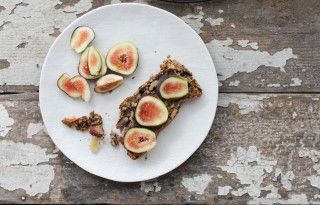
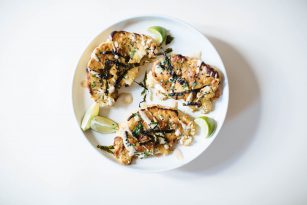
This bread is unique. Nourishing Nut & Seed Bread is not a light, fluffy, airy type of bread, it’s quite the opposite. It’s chewy, nutty, hearty, filling, moist, and very satisfying. You can certainly use it as you would sandwich bread, but I prefer to use it open-faced and topped with chia jam, fruit butters, homemade nut butters, Classic Cashew Cheese, mashed avocado with fresh lime and sea salt, a drizzle of honey, or simply a dash of cinnamon. This bread is basically allergy-free (minus the nuts), and it contains fiber galore, vitamins E, A, K, protein, essential amino acids, healthy fats, antioxidants. It’s also anti-inflammatory compared to it’s whole wheat bread counterparts. Let’s not forget the most important factor – it’s incredibly easy on the digestive system which is a must in all my recipes! Good digestion equals a happy belly and clear mind.
A couple things you might enjoy using to make this process efficient and extra simple: Silicone bread loaf | nut and seed grinder | cooling rack

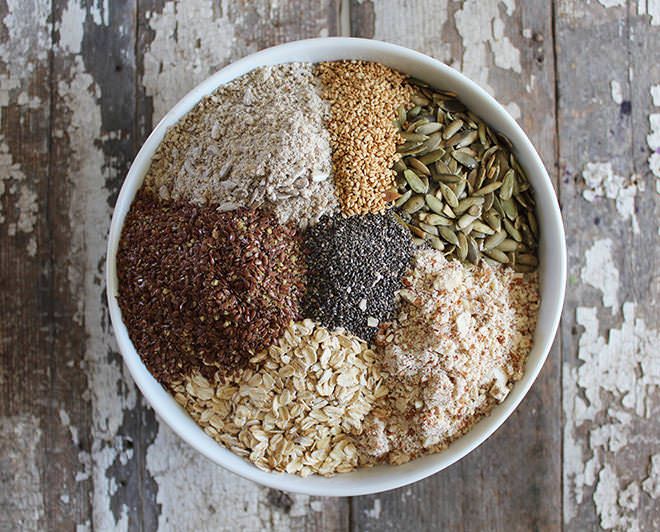
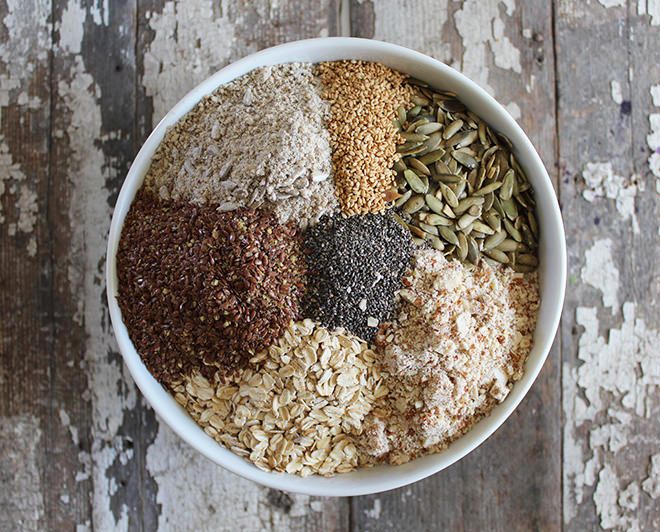
- 3 cups filtered water (start with 2 1/2 and add more as needed)
- 1 cup raw sunflower seeds, ground
- 1 cup raw almonds, ground
- 1 cup rolled oats, gluten free
- 1/2 cup raw pumpkin seeds
- 1/2 cup flax seeds, ground
- 1/4 cup coconut flour
- 3 tablespoon organic coconut oil, melted
- 3 tablespoons psyllium husk powder
- 2 tablespoons chia seed, ground
- 1 1/2 tablespoons sesame seeds
- 1 1/2 tablespoons maple syrup
- 1 tablespoon maca powder (optional, but great flavor)
- 1 teaspoon caraway seeds, ground
- 1 teaspoon sea salt
- fresh ground black pepper
- small pinch of dried tarragon
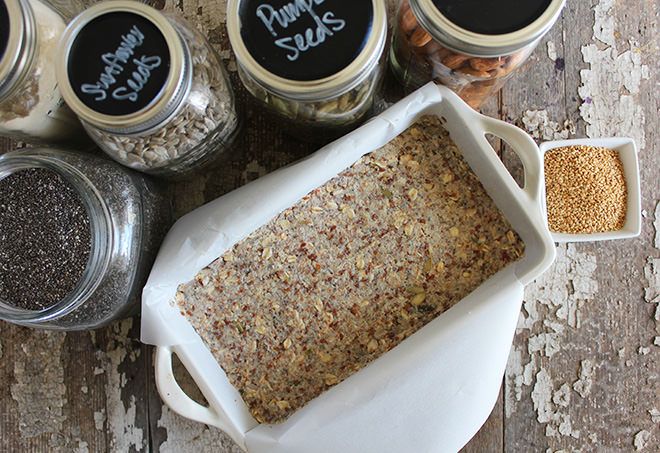
- Measure out the amount of nuts/seeds first, then follow grinding instructions.
- In a food processor, blender, or nut/seed grinder take almonds, flax seeds, sunflower seeds, and chia seeds and grind until a fine powder is created. Pour into a large mixing bowl and set aside.
- In a small mixing bowl, whisk together melted coconut oil, maple syrup, herbs/spices, and water until combined.
- In a large mixing bowl, combine the ground nuts and seeds with all other dry ingredients (oats, pumpkin seeds, psyllium husk, sesame seeds, coconut flour, maca)
- Pour the “wet” mixture from the small mixing bowl into the large mixing bowl with the dry ingredients. (add more water here as needed only)
- Stir until well combined- the psyllium husk, chia, flax seeds, and coconut flour will rapidly absorb the water and create a dough texture.
- In a lined bread pan- standard size 9×5 (I like to use parchment paper, well greased or a silicone bread pan), pour the dough mixture into the pan.
- Evenly spreading the mixture and pressing down until firm and flat on the top.
- Let set at room temperature for about 2 hours (or more). This is important as the chia seeds, flax seeds, psyllium, and coconut flour will have more time to absorb the liquid mixture and soften.
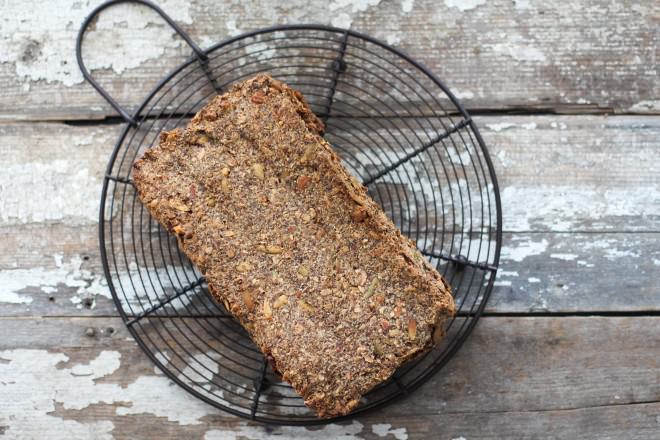
- Preheat oven to 350 degrees F and bake for 60-75 minutes, remove bread loaf pan and either lift the parchment paper from the sides to easily lift the loaf out of the bread pan or you can flip upside down taking the bread loaf out of the pan. Be gentle, this bread is still fragile and hot.
- Place the bread loaf (without the pan) directly onto the baking rack in the center of the oven, bake for an additional 60 minutes or until golden brown and firm.
- Let cool at room temperature before slicing (important).
- Store the bread in an airtight container in the refrigerator for 5-7 days.
- You can also freeze this loaf in individual slices.
- Enjoy!
This recipe was inspired by the several bloggers who have tried their successful creations of a gluten-free, egg-free nut and seed bread such as Sarah B from My New Roots, and lovely duo from Green Kitchen Stories.
MORE GLUTEN FREE BREADS + BAKED GOODS:
The Ultimate Gluten Free Biscuits
Gluten Free Sweet Potato Pancakes
Gluten Free Beet Blueberry Muffins
CROUTONS: make croutons for soup and salad by slicing the load in one piece followed by cutting into cubes and toasting in the oven at 350 degrees F for about 10-15 minutes or until brown and crunchy! Keep an eye on them as they burn quickly.
Whadya think?
After a long post here today, all in all, I hope you enjoy this bread as much as I do! Please feel free to share this with all your friends and family who are gluten free, are looking to try a new bread recipe, or simply love an alternative to regular breads. I’d love to hear your feedback on this, comment below.
Enjoy!
xx McKel